


OST to PST Converter tool |
Posted: August 31, 2017 |
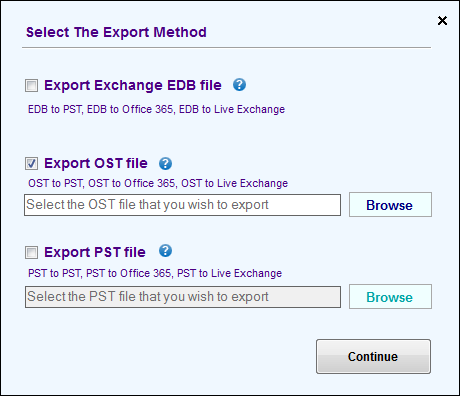
Anyone who works with Exchange mailbox accounts in offline mode needs OST file for Outlook which stores your mail and data. The OST file gets synced when Outlook is connected to server. This is useful when server has a maintenance or crash or any other issues. But, if you need it on different computer, usual copy/paste method wont work like it does with PST files. So, we can use EdbMails to convert OST to PST for these circumstances or to recover from a corrupted OST to create PST by convert operation. This is safest way to migrate data from OST to PST by doing it automatically than trying to do it manually if youre not technically experienced to go through all process in outlook export and import functions. So, using third party software like EdbMails gets you user friendly GUI with automated conversion and 24/7 support. How to perform OST to PST conversion using EdbMails? 1. Go to AllPrgorams and open “EdbMails” software. Then, enter your login credentials of account you created at edbmails.com website in the window loaded. Now, select “Login” button. Make sure you have internet connected for this login. 2. Here, there are 3 options to choose. Select the 2nd option “Export Exchange OST file” operation to convert OST to PST. Next, Click on the “Browse” button and find the OST file that you want to convert and click “Open”. Hit “Continue” option. Now wait till the “OST Recovery Operation Progress” window closes and the Main EdbMails window opens with all the mailboxes data displayed in tree view on left side.
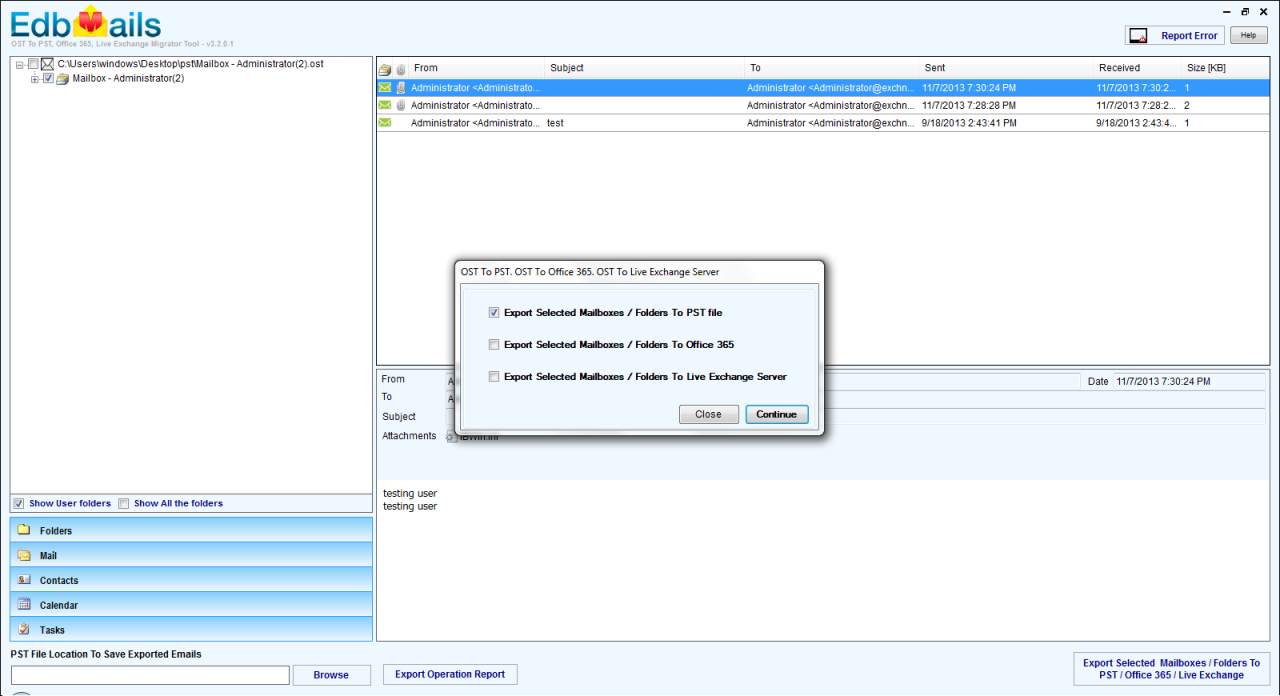
3. Now click on “+” icon to drop the list of folders inside mailbox that you want to view. Select any folder inside that tree view and the content inside the folder will be listed on the right side of the application window. You can “Stop and proceed with export operation” if you wish to or you can wait and review data in preview mode before exporting to ensure you are choosing right folders that you want to convert or just select all and convert. 4. Select all the checkboxes of folders/mailbox that you want to convert and then right click on left side folder panel or hit the bottom right button “Export Selected Mailboxes/Folders to PST/ Office365/ Live exchange”. Now, select “Export selected Mailboxes/Folders to PST file” in the window that popped with 3 options. The other 2 options are to export into Office365 & Exchange Server if you want but we will focus on OST to PST here.
5. In the next window, you have filters options. The default options will export everything that you have selected already. If you want further filtering according to subject/date etc, you can choose here. Now, Click on “Export OST to PST”. Now you will be asked to pick a location for export PST file save location if its not set already. Click “OK” after picking a folder for export location and you will be prompted with final confirmation before starting export. Choose “yes” to start operation. 6. Now, you can follow the ongoing progress through the progress indicating window and once its done, you will get a report window. Thats, it. You have successfully converted OST to PST in safe and easy process.
For more info visit : https://www.edbmails.com/pages/ost-to-pst-converter-for-ost-to-pst.html visit website: https://www.edbmails.com
|
||||||||||||||||||
|
||||||||||||||||||